Whenever I bake the Nostalgic Matilda Chocolate Cake Recipe, I’m instantly taken back to cozy afternoons at my grandma’s kitchen. The rich aroma of cocoa blended with coffee filling the air, the way the cake’s moist crumb melts in your mouth—it’s a classic that never fails to impress. I’ve served this cake at birthdays, simple Sunday get-togethers, and once, it even stole the show at a holiday potluck. Everyone asks for the recipe, and honestly, it’s a joy to share because it’s as approachable as it is indulgent.
Why This Recipe Shines
- Flavor Harmony: Rich Dutch-processed cocoa and hot coffee work together for deep, complex chocolate notes.
- Easy Assembly: Simple mixing steps and accessible ingredients make this cake beginner-friendly.
- Texture Play: Moist crumb with a luscious, fluffy chocolate frosting balances every bite.
- Showstopper Finish: Generous frosting coverage makes it perfect for celebrations and gifting.
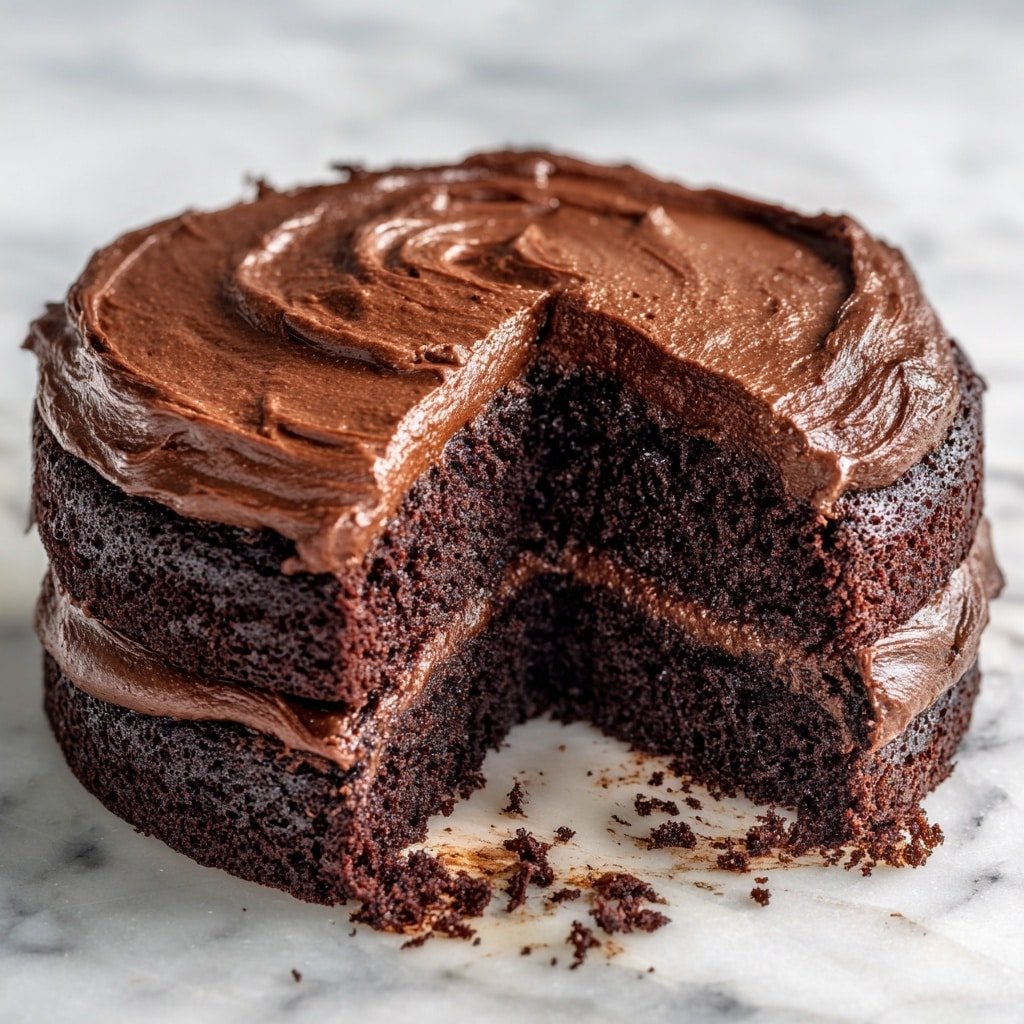
What makes the Nostalgic Matilda Chocolate Cake Recipe stand out is how it combines a deeply satisfying chocolate flavor with a tender, moist cake texture that’s not too dense. The coffee isn’t just an ingredient here—it’s the secret weapon that blooms the cocoa powder, unlocking rich, velvety layers of chocolate aroma. When you slice into this cake, you’ll notice the beautiful dark color that hints at the indulgence inside. Plus, the frosting is light yet decadent, perfect for frosting enthusiasts like me who aren’t shy with a generous spread.
Don’t worry if you’re new to baking chocolate cake—I’ll walk you through each step with tips that help you get it right the first time. From mixing the batter just enough to knowing how to properly cool your layers before frosting, I’ve got you covered. This Nostalgic Matilda Chocolate Cake Recipe brings all the fun and richness of classic chocolate cake without any of the intimidation.
Ingredients You’ll Be Working With
Before we dive in, remember that precise measuring is key to a successful cake, so do check the recipe card below for amounts. Use level measuring cups for dry ingredients and liquid measuring cups for wet ones to keep things on point.
- All-purpose flour: The base of the cake; spoon and level for a tender crumb.
- Granulated sugar: Sweetens and helps create a soft texture.
- Dutch-processed cocoa powder: Delivers deep chocolate flavor; sift to avoid lumps.
- Baking soda: Leavens the cake for lift and lightness; check freshness.
- Baking powder: Works with soda to ensure the cake rises evenly.
- Salt: Balances sweetness and amplifies cocoa taste.
- Buttermilk: Adds tang and moisture; room temperature for smooth mixing.
- Vegetable oil: Keeps the cake moist and tender; can substitute with mild olive oil.
- Large eggs: Help structure; use at room temperature for better incorporation.
- Vanilla extract: Enhances overall flavor; pure extract preferred.
- Hot coffee: Blooms cocoa flavor and thins the batter for moistness; freshly brewed is best.
- Unsalted butter: For the frosting; softened to blend smoothly.
- Semi-sweet chocolate: Melts into the frosting for richness.
- Powdered sugar: Sweetens and thickens the frosting; sift to prevent lumps.
- Heavy cream or milk: Adjusts frosting texture; cream makes it silky and light.
- Pinch of salt (in frosting): Enhances chocolate notes and balances sweetness.
If you need to swap ingredients, whole milk can replace buttermilk (add a teaspoon of lemon juice for tang), and dairy-free milk substitutes work well in the frosting, too. Just remember that the coffee is non-negotiable for that signature depth.
Chef’s Note
You’ll find the complete list of ingredients with exact measurements in the printable recipe card at the bottom of this post.
Tools You’ll Need
- Two 9-inch round cake pans: Ensures evenly sized layers for stacking.
- Mixing bowls: Separate bowls for dry and wet ingredients help with better mixing.
- Whisk and spatula: For smooth mixing and folding without overworking batter.
- Sifter or fine mesh sieve: Prevents lumps in dry ingredients and frosting.
- Electric mixer or stand mixer: Makes frosting light and fluffy but you can also whisk by hand if patient.
- Kitchen scale (optional): Helpful for dividing batter evenly for consistent layers.
- Cooling rack: Allows cake layers to cool completely without getting soggy.
- Thermometer (optional): To check for cake doneness at 210–215°F internal temp for perfect moist crumb.
How to Make Nostalgic Matilda Chocolate Cake Recipe
Ready to bake? Let’s make sure you have your oven preheated and pans prepped. I like greasing, flouring, and lining pans with parchment circles to make cake removal a breeze.
- Prepare your pans: Preheat your oven to 350°F (175°C). Grease two 9-inch round cake pans, dust with flour, and line the bottom with parchment paper circles for easy release.
- Sift dry ingredients: In a large bowl, sift the flour, granulated sugar, Dutch-processed cocoa powder, baking soda, baking powder, and salt. Whisk until combined and smooth; this prevents lumps and ensures a tender crumb.
- Mix wet ingredients: In a separate bowl, whisk together room temperature buttermilk, vegetable oil, eggs, and vanilla extract until just combined. This keeps the batter silky and easy to fold into your dry mix.
- Combine wet and dry: Pour the wet ingredients into the dry, mixing on low speed until moistened. Be careful not to overmix; a few streaks are okay here.
- Add hot coffee: Slowly pour in the freshly brewed hot coffee while mixing gently. Don’t be surprised if the batter becomes thin—this is the secret to the moist crumb that defines this cake.
- Divide and bake: Spoon the batter evenly into prepared pans—using a kitchen scale here gives the best results. Tap the pans lightly on the counter to pop any air bubbles. Bake for 30-35 minutes. Check doneness by inserting a toothpick; it should come out with a few moist crumbs.
- Cool the cakes: Let the pans cool on a rack for 15 minutes. Then carefully invert the cakes onto the rack and peel off the parchment paper. Cooling completely is crucial before frosting to prevent melting.
- Make the frosting: While cakes cool, melt the unsalted butter and chopped semi-sweet chocolate together until smooth and glossy. In a large bowl, sift cocoa powder and powdered sugar. Add the chocolate mixture, cream, vanilla, and a pinch of salt. Beat at medium-high speed for 2-3 minutes until light and fluffy.
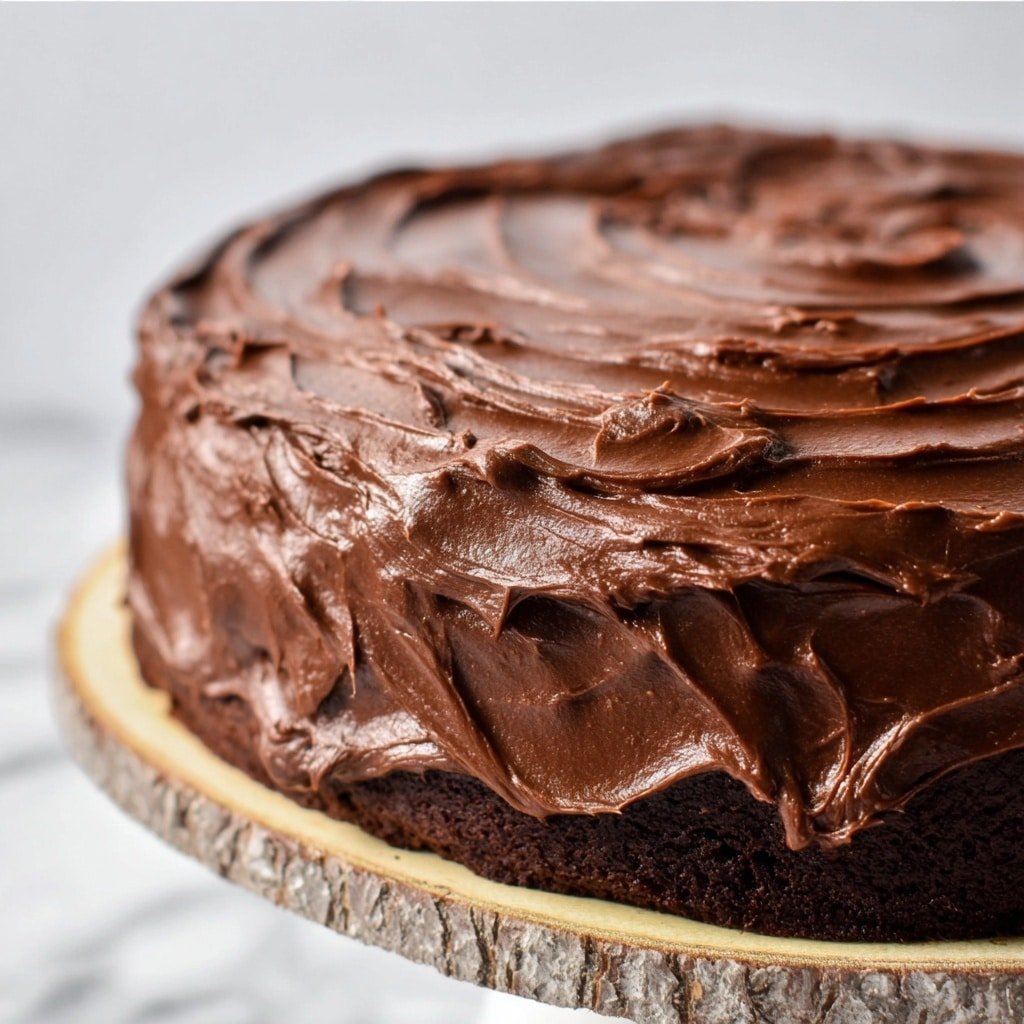
- Assemble and frost: Place one cake layer on your serving plate, spread a generous layer of frosting, then top with the second layer. Cover the top and sides with the remaining frosting. Don’t be shy here—this cake loves a thick, luscious coat.
Kitchen Wisdom
- Tip 1: Use room temperature eggs and buttermilk to get a smoother, more uniform batter.
- Tip 2: Sifting dry ingredients prevents lumps and yields a finer crumb.
- Tip 3: Don’t skip the hot coffee—it unlocks flavor and keeps the cake moist.
- Tip 4: Allow cake layers to cool fully before frosting to avoid melty, sliding frosting.
How to Serve
Flavor Boosters
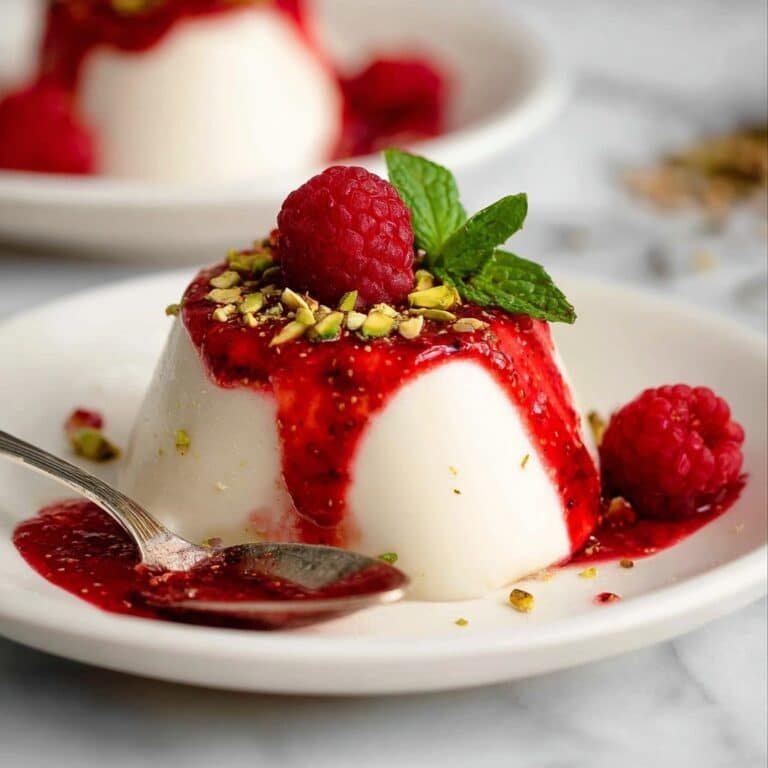
Add a dusting of cocoa powder or a sprinkle of chocolate shavings on top for a professional finish. For extra indulgence, a drizzle of caramel or raspberry sauce offers a fruity counterpoint to the rich chocolate. Fresh berries like raspberries or strawberries provide a refreshing pop of color and tartness that balances the cake’s sweetness beautifully.
Perfect Pairings
Pair this nostalgic cake with a cup of freshly brewed coffee or a glass of cold milk to complement its deep chocolate flavors. For adults, a rich stout or a ruby red wine like a Zinfandel elevates the experience. If you’re serving it at a party, a scoop of vanilla ice cream alongside the cake is always a crowd-pleaser.
Presentation Touches
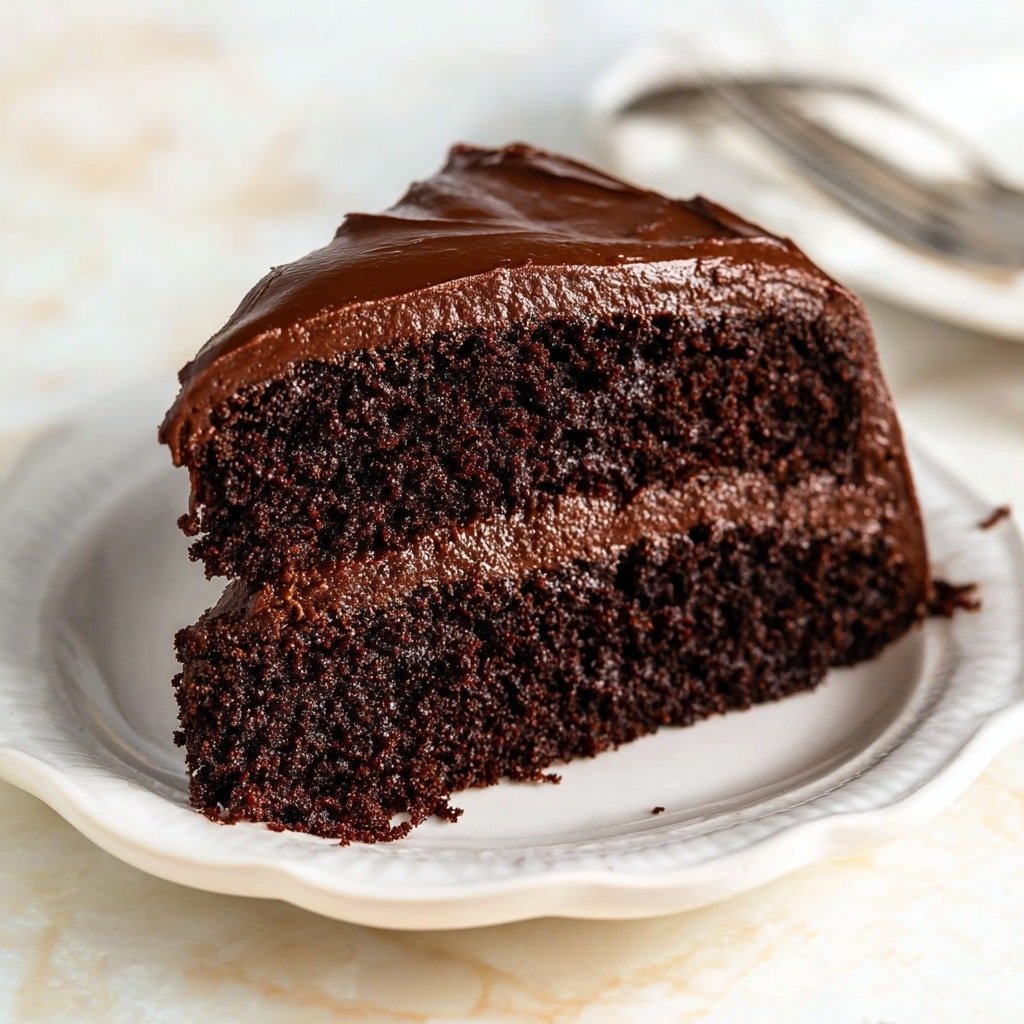
Slice the cake into generous wedges, or for gatherings, consider cutting it into small squares and serving on tiered trays with decorative picks. Wrap leftovers tightly in plastic wrap and store in the fridge for gifting the next day—it tastes even better after resting! Leaving a few sprigs of fresh mint on the plate adds a lovely finishing touch.
Variations & Easy Swaps
- Dairy-free: Use almond or oat milk plus vegan butter to adapt the frosting and cake easily.
- Extra chocolate: Fold in chocolate chips or chunks into the batter for delightful pockets of melted chocolate.
- Nutty twist: Add toasted walnuts or pecans to the batter or sprinkle on top for crunch.
- Spiced chocolate: Incorporate a pinch of cinnamon or chili powder for subtle warmth.
- Frosting swap: Try cream cheese frosting for a tangy balance to the rich cake.
Make-Ahead, Storage & Reheating
- Make the cakes a day ahead and wrap them airtight in plastic wrap to keep moist.
- Store the frosted cake covered tightly in the refrigerator for up to 4 days; bring to room temp before serving.
- Freeze unfrosted layers tightly wrapped for up to 3 months; thaw overnight in the fridge.
- Reheat individual slices gently in the microwave for 15–20 seconds to revive softness.
FAQs
- Can I use instant coffee instead of brewed coffee? Yes, just dissolve it in hot water to replace brewed coffee and maintain the flavor boost.
- Why is my cake crumb dry? Likely overbaking or overmixing. Try checking for doneness a few minutes early and mix the batter only until just combined.
- Can I make this cake gluten-free? Substitute with a gluten-free flour blend, but expect minor texture differences.
- How long can I store this cake? Properly wrapped, the frosted cake lasts 3–4 days refrigerated without sacrificing flavor or moisture.
Your Nostalgic Matilda Chocolate Cake Recipe is ready to enjoy—time to dig in and savor every bite!
PrintNostalgic Matilda Chocolate Cake Recipe

Nostalgic Matilda Chocolate Cake is a deeply satisfying, moist, and decadent chocolate cake, perfect for special celebrations or whenever you’re craving an indulgent dessert. This recipe combines rich Dutch-processed cocoa with hot coffee for enhanced chocolate flavor and a tender crumb, finished with a luscious chocolate frosting for the ultimate nostalgic treat.
- Prep Time: 20 minutes
- Cook Time: 35 minutes
- Total Time: 55 minutes
- Yield: 12 servings
- Category: Dessert
- Method: Baking
- Cuisine: American
Ingredients
Dry Ingredients
- 2 cups all-purpose flour
- 2 cups granulated sugar
- 3/4 cup Dutch-processed cocoa powder
- 2 tsp baking soda
- 1 tsp baking powder
- 1 tsp salt
Wet Ingredients
- 1 cup buttermilk, room temperature
- 1/2 cup vegetable oil
- 2 large eggs, room temperature
- 1 tsp vanilla extract
- 1 cup freshly brewed hot coffee
Frosting Ingredients
- 1 cup unsalted butter, softened
- 8 oz semi-sweet chocolate, chopped
- 2/3 cup Dutch-processed cocoa powder
- 4 cups powdered sugar
- 1/2 cup heavy cream or milk
- 1 tsp vanilla extract
- A pinch of salt
Instructions
- Prepare Pans and Oven: Preheat your oven to 350°F (175°C). Grease and flour two 9-inch round cake pans. Trace and cut parchment paper circles to line the bottom of the pans for easy cake removal.
- Mix Dry Ingredients: In a large bowl or stand mixer bowl, sift together the flour, sugar, cocoa powder, baking soda, baking powder, and salt. Whisk until combined and smooth.
- Combine Wet Ingredients: In a separate medium bowl, whisk the buttermilk, vegetable oil, eggs, and vanilla extract until just blended.
- Create Batter: Pour the wet ingredients into the dry mixture. Mix on low speed gently just until moistened. Slowly pour in the hot coffee while mixing at low speed, resulting in a thin batter. Mix for an additional minute until smooth and fragrant.
- Bake the Cakes: Evenly divide the batter between the prepared pans, tapping them gently on the counter to release air bubbles. Bake for 30-35 minutes until a toothpick inserted in the center comes out with a few moist crumbs.
- Cool the Cakes: Let cakes cool in the pans on a wire rack for 15 minutes. Then invert and remove from pans and parchment paper; allow them to cool completely before frosting.
- Make the Frosting: Gently melt the butter and chopped chocolate together over low heat or in the microwave, stirring until smooth and glossy. Transfer to a large bowl. Sift in cocoa powder and powdered sugar and beat on low until combined.
- Add Finishing Ingredients: Add the cream, vanilla extract, and salt to the frosting mixture. Beat on medium-high speed for 2-3 minutes until light and fluffy.
- Assemble the Cake: Place one cooled cake layer on a serving plate. Spread a generous amount of frosting over it. Place the second layer on top. Frost the top and sides of the cake evenly.
- Serve and Enjoy: For best results, allow the cake to rest so the frosting sets. Serve at room temperature and enjoy your nostalgic, luscious chocolate cake.
Notes
- Room temperature ingredients help achieve a smooth batter and tender crumb.
- Do not overbake; start checking for doneness a few minutes before the end time to keep the cake moist.
- Cool cakes completely before frosting to prevent melting and sliding frosting.
- Sift dry ingredients, especially cocoa powder and powdered sugar, to prevent lumps and ensure smooth texture.
- Using hot coffee blooms the cocoa powder, enhancing the chocolate depth.
- Mix batter gently and only until combined to avoid tough cake texture.